Running Signal Messenger REST API in Azure Web App for Containers
Why would you want to run the Signal Messenger as an Azure Web App?
Because you can ;-) No seriously I was looking for way to integrate Signal’s messaging capabilities into solutions like Azure Logic Apps or Power Automate.
At one of my customers we are using a WhatsApp group to share news about Azure and I’m in the process of moving away from WhatsApp to Signal and this was a good incentive to figure out if I’m able to integrate Signal into some example Logic App flows. If you are looking for reasons to switch to Signal check this Microsoft customer story where Signal is sharing that it’s using Azure confidential computing. There might be more reasons for moving or using Signal as your prefered messenger client ;-)
I want to thank my colleagues Mohammad Shboul and Christo Matskas for helping out with some questions I had implementing this solution.
Scenario
I would like to figure out if the following scenario can be implemented using Signal and Azure Logic Apps.
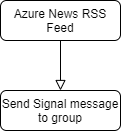
So each time a new Azure news item is published this should be sent to a Signal Messenger group.
Architecture
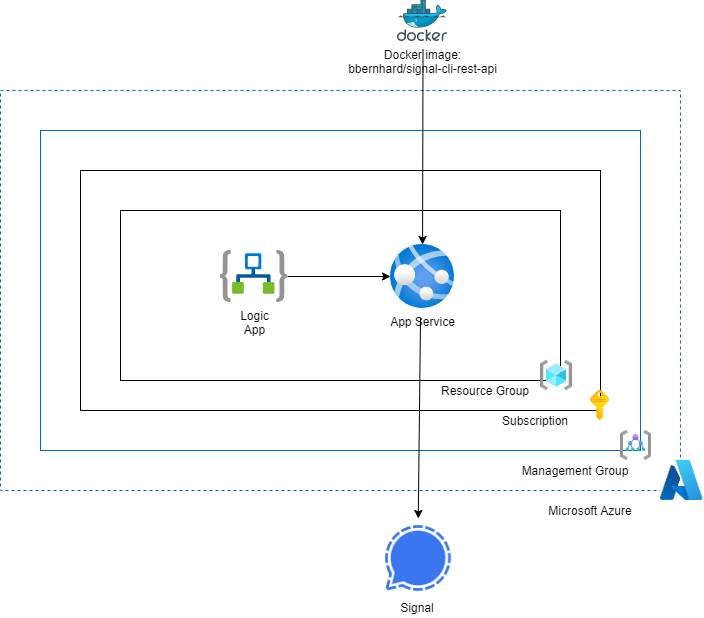
An Azure Logic App is calling the Signal CLI REST API running in an Azure Web App for Containers to send messages the a Signal Messenger Group.
Implementation steps
The following high-level steps are used to create this solution.
- Create Resource Group
- Create a Web App for Containers
- Test Signal-CLI-REST-API Web App
- Create a Logic App
- Create a Logic App Workflow
- Add Authentication to Web App
- Update Logic App workflow with Authentication information
- Create end-to-end Logic App Workflow
Create Resource Group
Create the Azure Resource Group where you want to deploy your Azure Web App and Logic App. See here for examples on creating resource groups.
Deploy and configure the Azure Web (for Containers)
With Web App for Containers you can easily deploy and run containerised applications on Windows and Linux. In our case we are going to run the Dockerized Signal Messenger REST API in an Azure Web App for Containers.
Go to the Azure Portal and select Web App for Containers in the Azure Marketplace and click on Create.
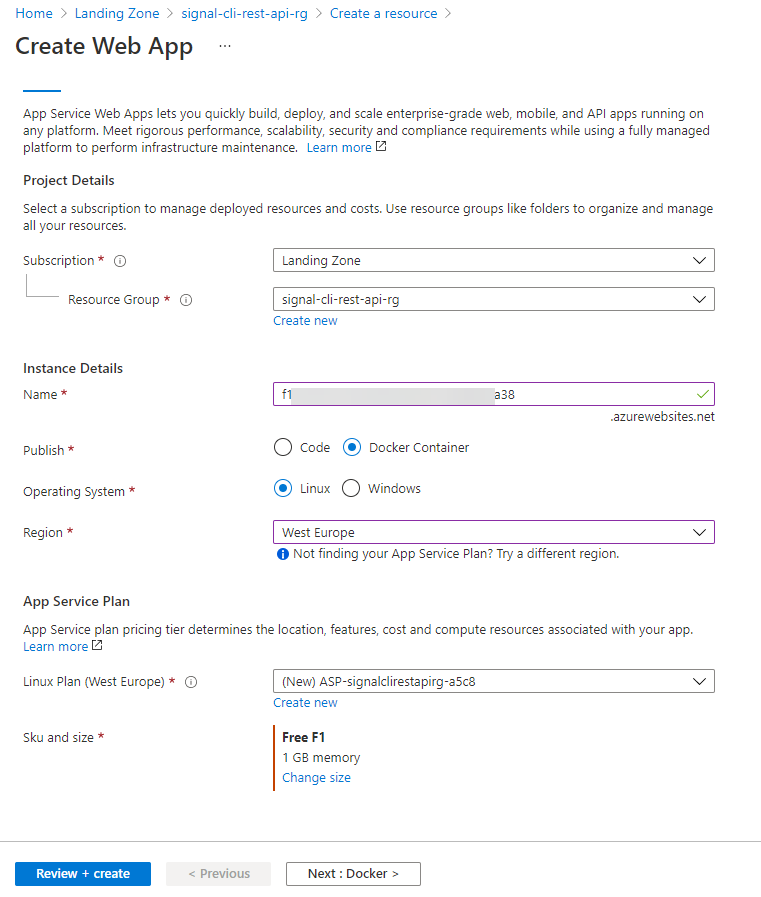
You now need to configure the Container settings of the Web App. Enter below information in these setting and save the setting. Use for the Docker Container image: bbernhard/signal-cli-rest-api:latest
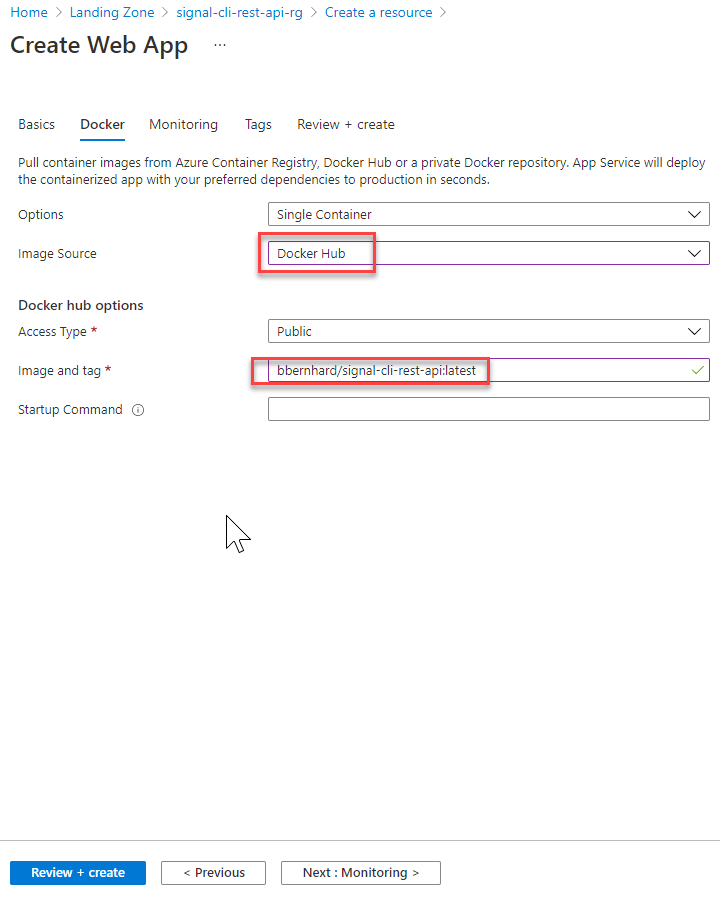
And click on Review + Create.
Wait till the deployment of the Web App is finished and continue with the configuration.
Link Signal CLI REST API Web App
To test the Signal-CLI-REST-API Web App we first need to link the Web App as a Signal Device.
To do so you need to call the following endpoint:
https://[name of your webapp].azurewebsites.net/v1/qrcodelink?device_name=[name of linked device]
E.g. https://demo-for-signal-cli-rest-api.azurewebsites.net/v1/qrcodelink?device_name=webapp
Open the url in your browser.
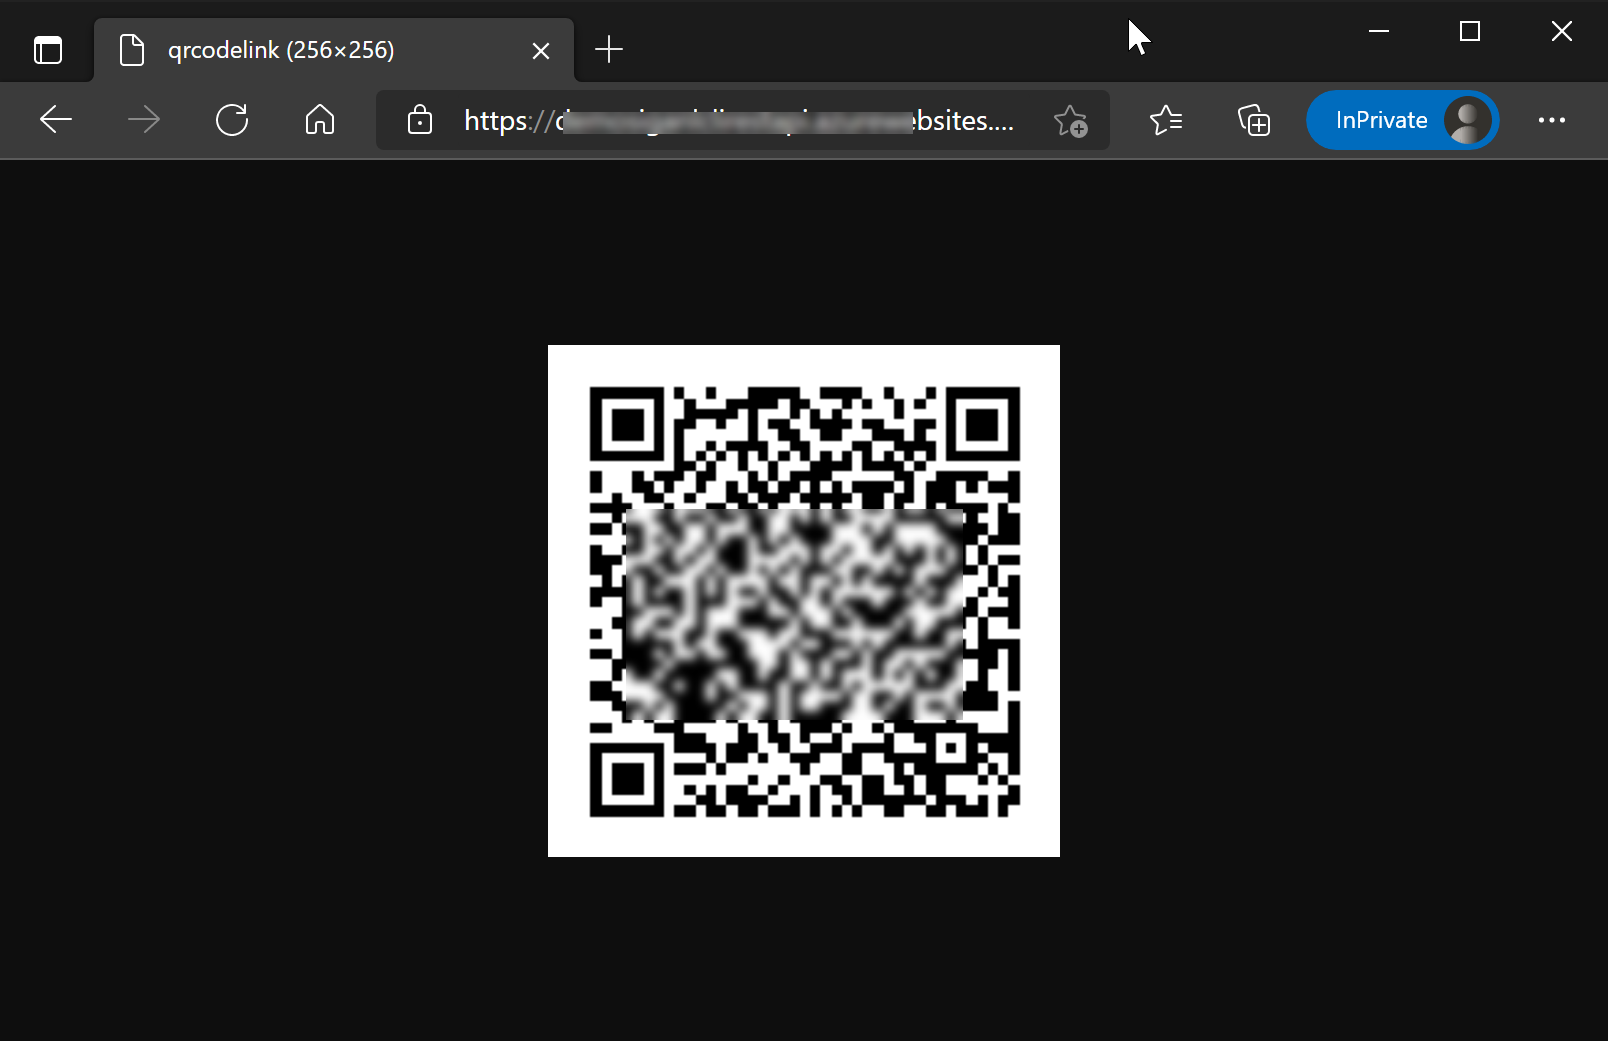
And scan the qrcode with your mobile Signal App via the menu.

After a succesful link of the Device you should see the something like this in your Signal Mobile App.

Test Signal-CLI-REST-API
You can now start testing receiving and sending Signal Messages using the REST API.
Sample Request
| Receive |
|---|
| HTTPS |
| GET https://[name of web app].azurewebsites.net/v1/receive/[mobile phone number plus country code. E.g. +316xxxxxxxx] |
Request Body
Content Type of the request: Not Applicable
Sample Response
Status code: 200
[{"envelope":{"source":"+316xxxxxxxx","sourceDevice":1,"timestamp":1623674475537,"syncMessage":{"type":"GROUPS_SYNC"}}},{"envelope":{"source":"+316xxxxxxxx","sourceDevice":1,"timestamp":1623674475672,"syncMessage":{"blockedNumbers":[],"blockedGroupIds":[]}}},{"envelope":{"source":"+316xxxxxxxx","sourceDevice":1,"timestamp":1623674476281,"syncMessage":{}}},{"envelope":{"source":"+316xxxxxxxx","sourceDevice":1,"timestamp":1623674476328,"syncMessage":{}}},{"envelope":{"source":"+316xxxxxxxx","sourceDevice":1,"timestamp":1623674476909,"syncMessage":{}}},{"envelope":{"source":"+316xxxxxxxx3","sourceDevice":1,"timestamp":1623674477024,"syncMessage":{"type":"CONTACTS_SYNC"}}}] |
Status code: 400
| User +316xxxxxxxx is not registered. |
Solution for “ 316xxxxxxxx is not registered” is unlinking Web App Device and relinking Device again.
Sample Request
| Send Message |
|---|
| HTTPS |
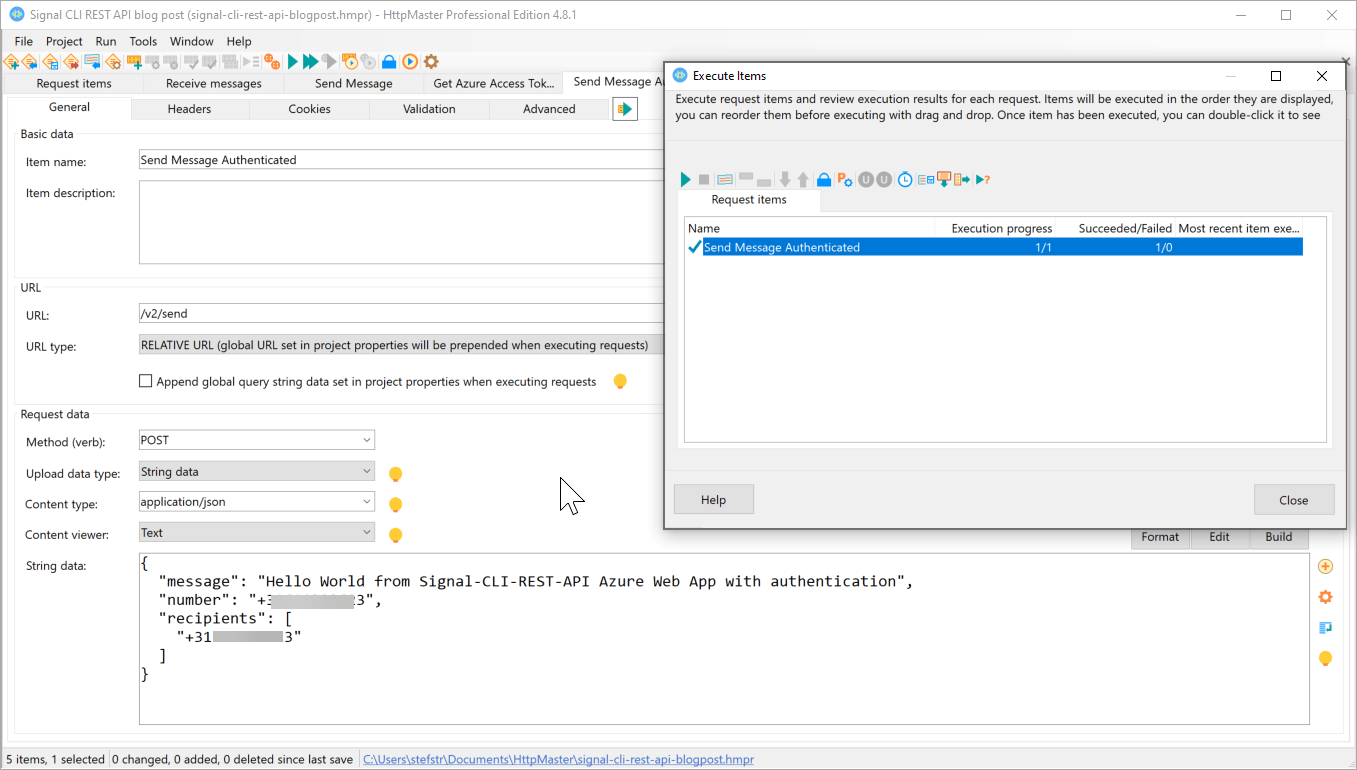
| POST https://[name of web app].azurewebsites.net/v2/send |
Request Body
{ |
Content Type of the request: application/json
Sample Response
Status code: 200
{ |
Status code: 400
| User +316xxxxxxxx is not registered. |
Solution for “ 316xxxxxxxx is not registered” is unlinking Web App Device and relinking Device again.
You can use tools like HttpMaster to test your Signal-CLI-REST-API Web App.
On you Signal Mobile App you should see the message appear.

Logic App installation and configuration
Follow the steps describe here to create a logic app using the Azure Portal.
After you have created the Azure Logic app go to the resource and open the Logic App Designer.
The end goal is to create the following Logic App Workflow.
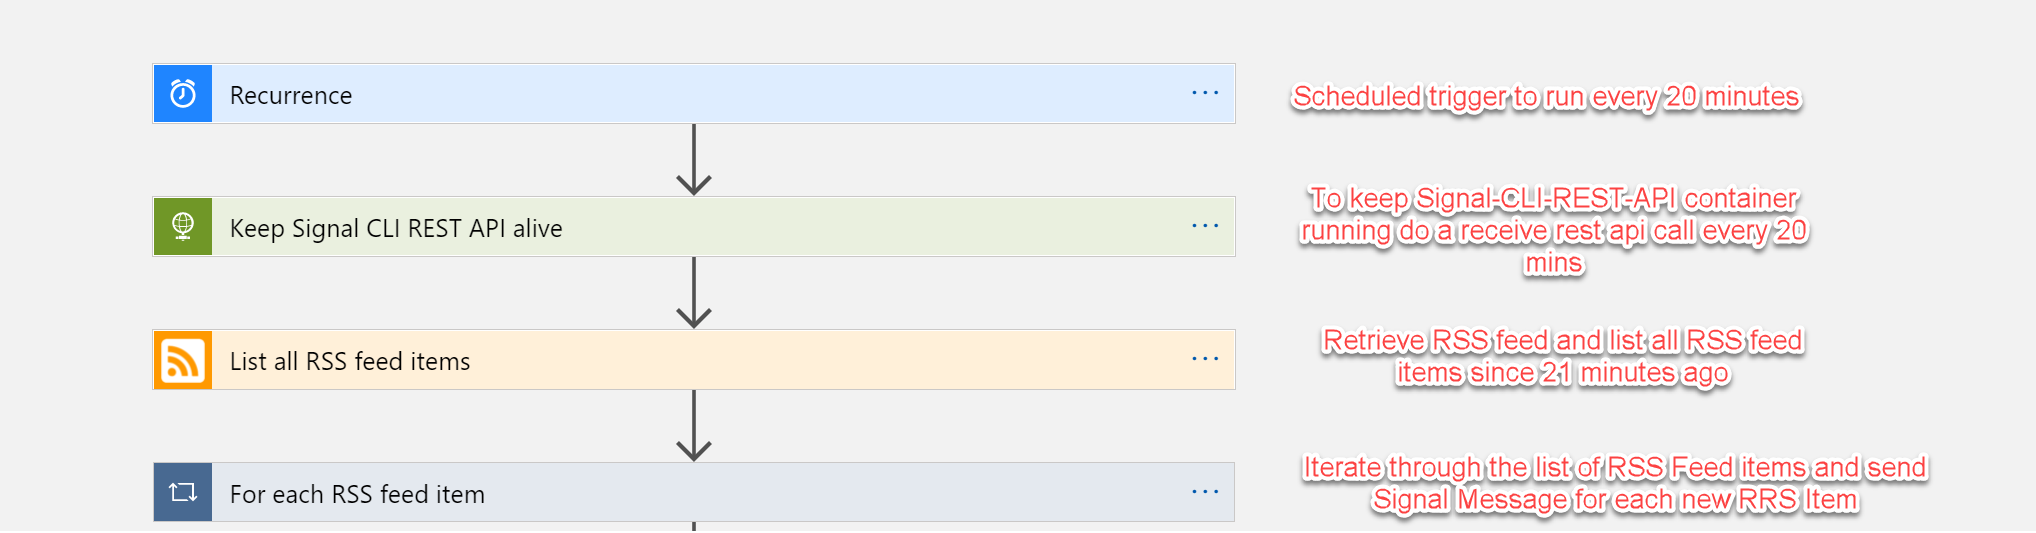
Start with selecting a Blank Logic App and search for the Schedule trigger and select Recurrence Schedule trigger.
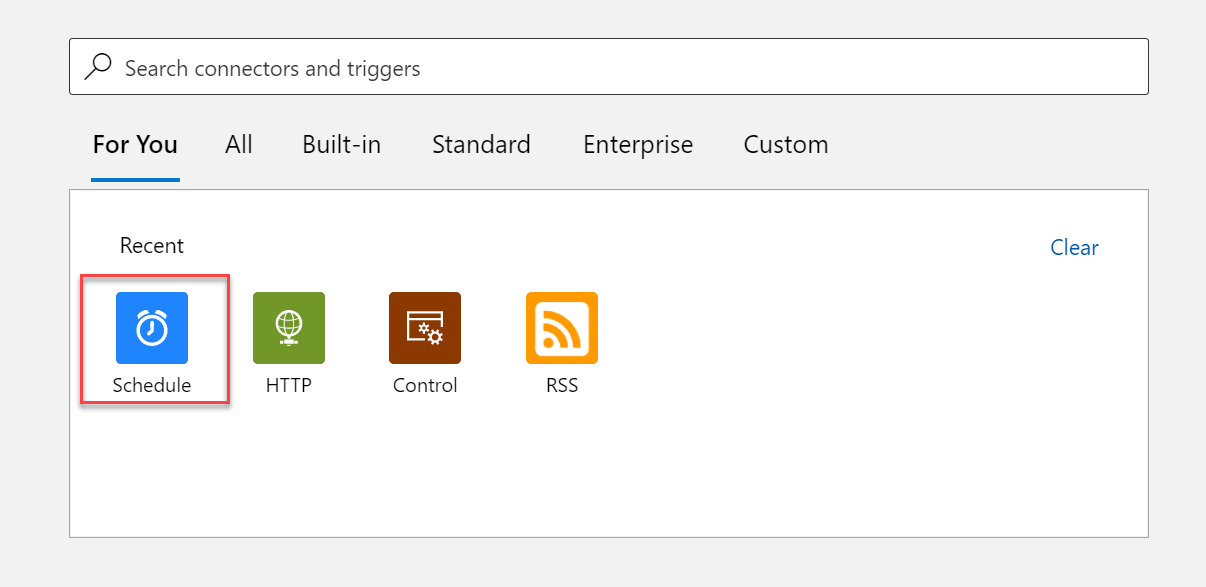
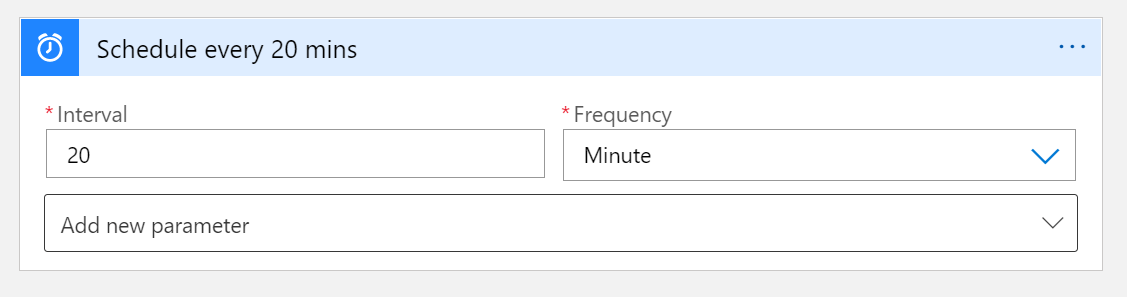
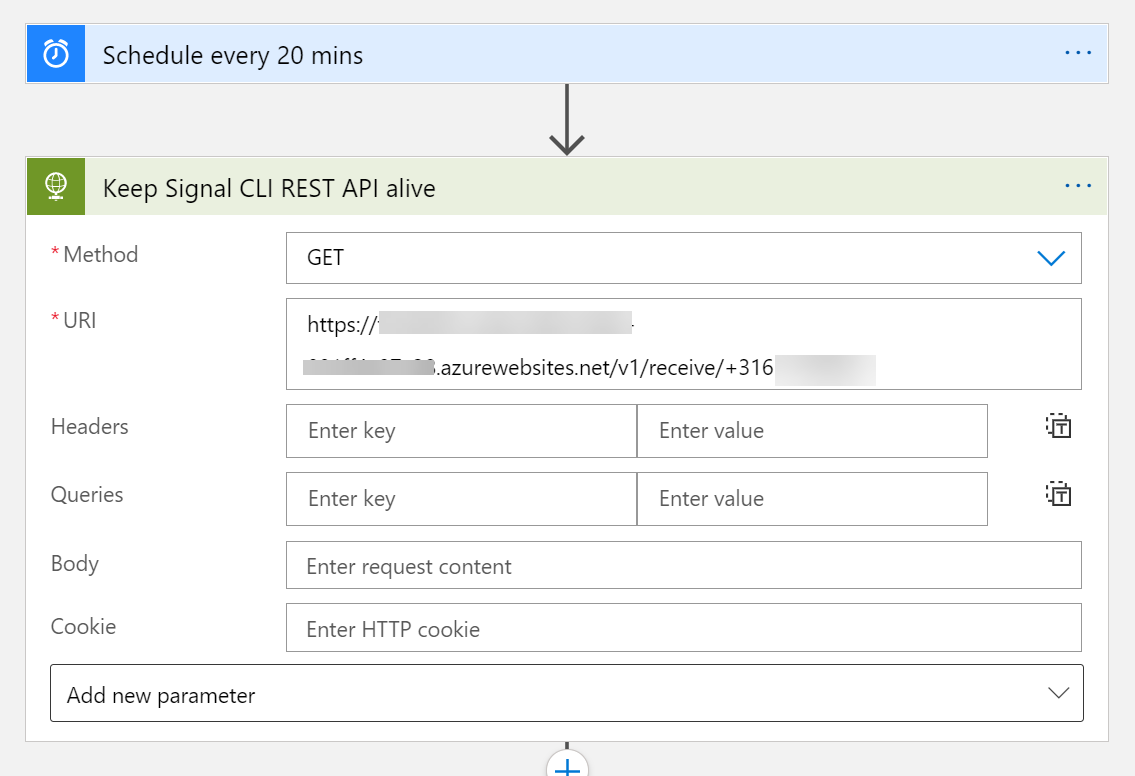
Next add the HTTP Built-in Action.
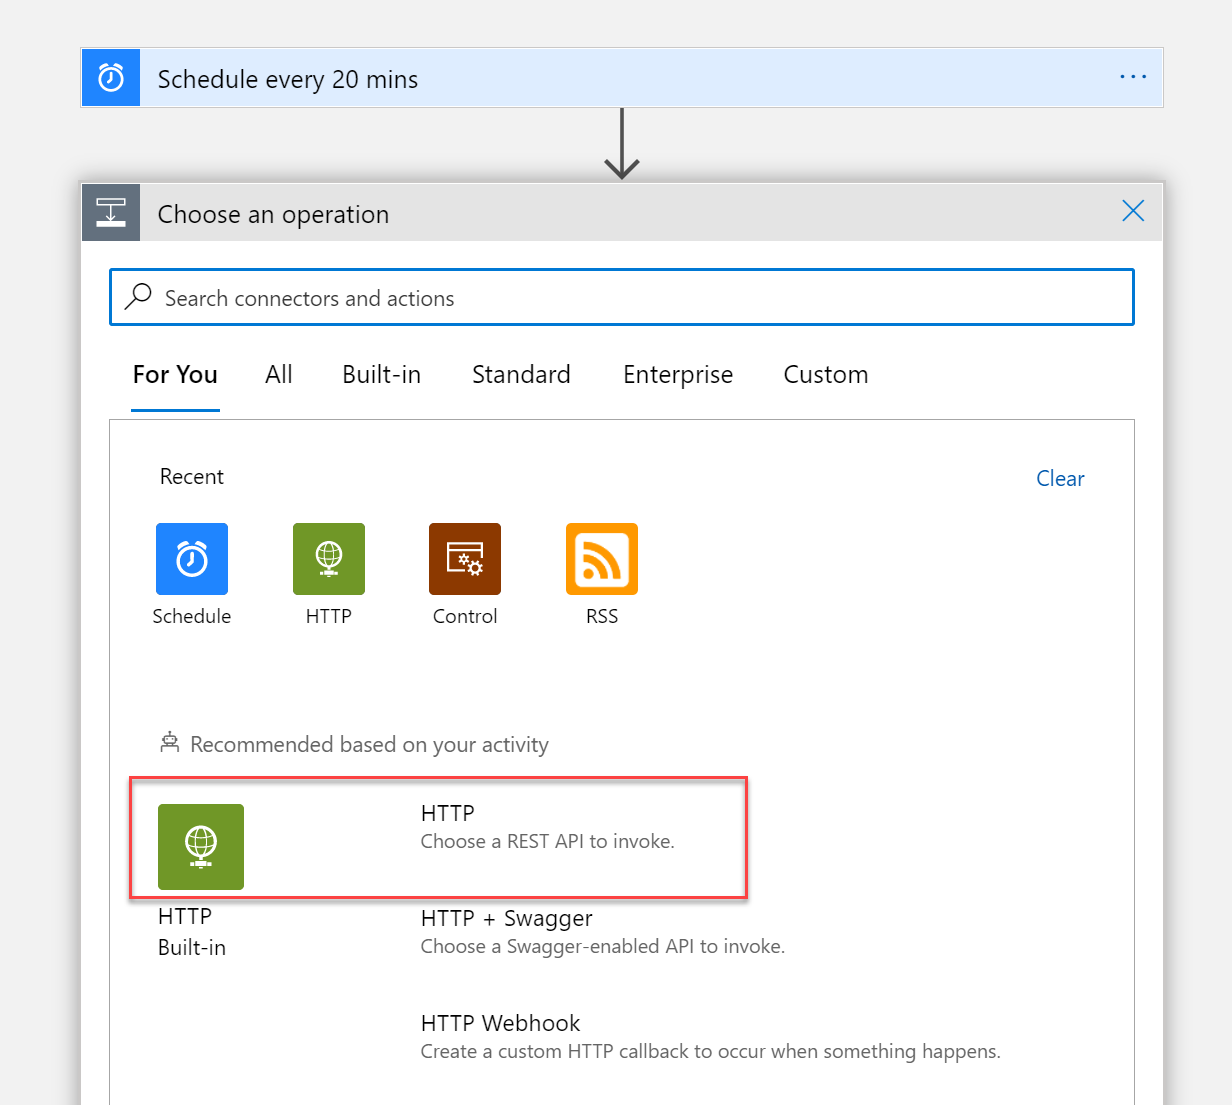
Configure the following settings in the HTTP request trigger.
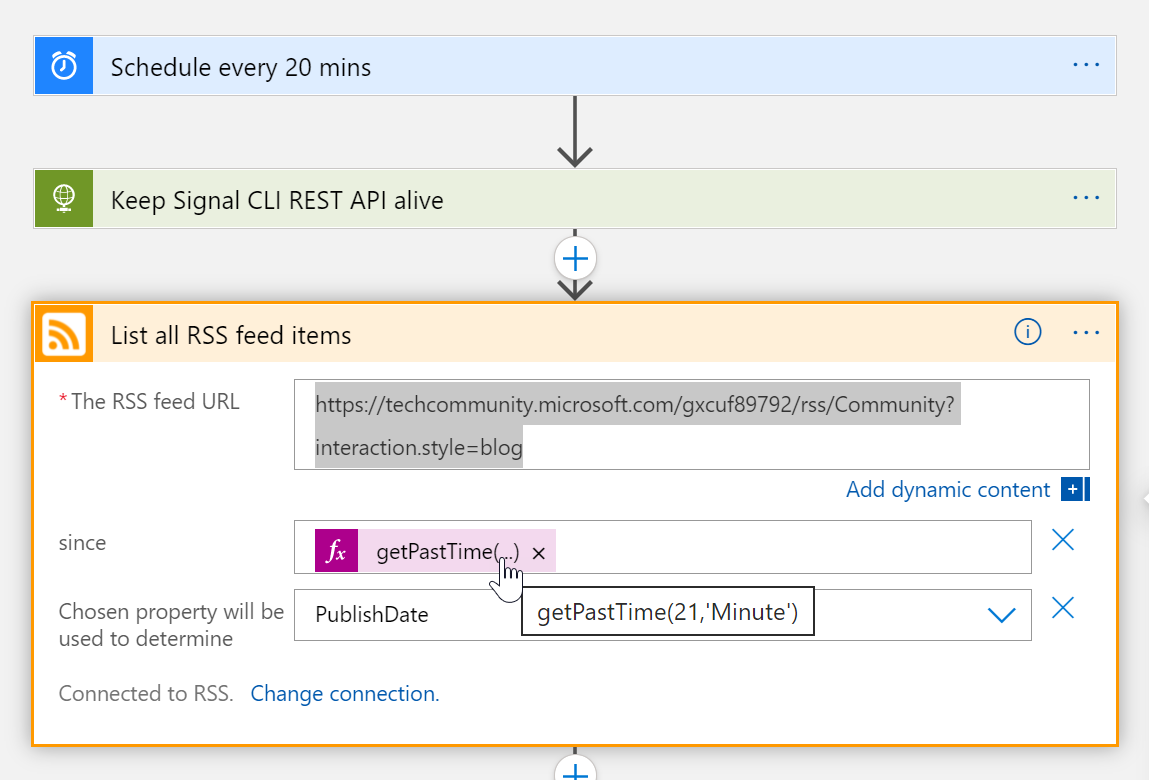
Add the List all RSS feed items action as a next step and configure as shown below. I’ve used the following RSS feed url: ‘https://techcommunity.microsoft.com/gxcuf89792/rss/Community?interaction.style=blog’
The final steps are executed in the for each Control Action
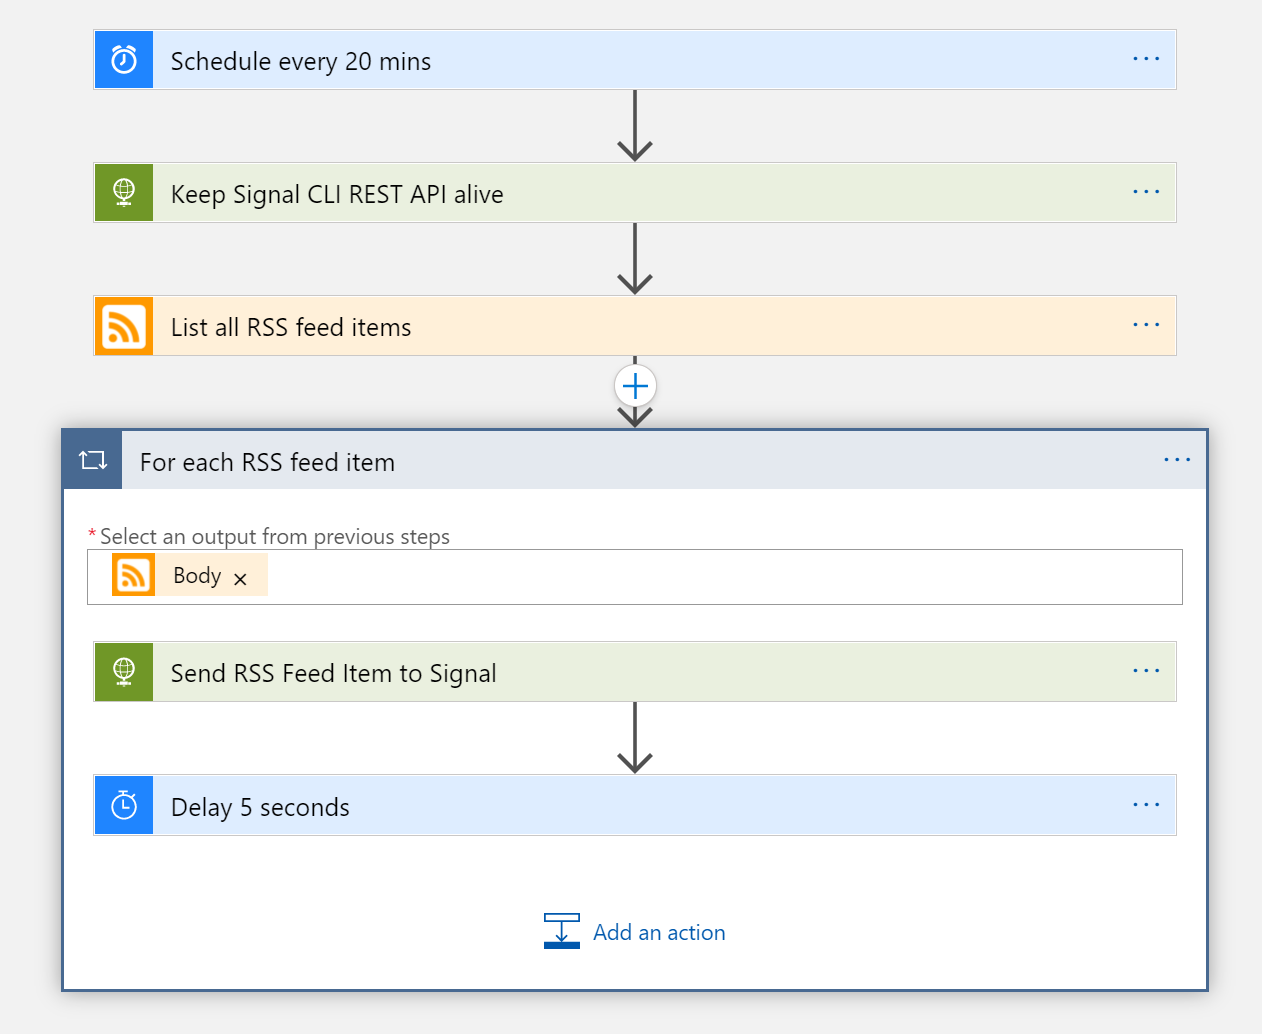
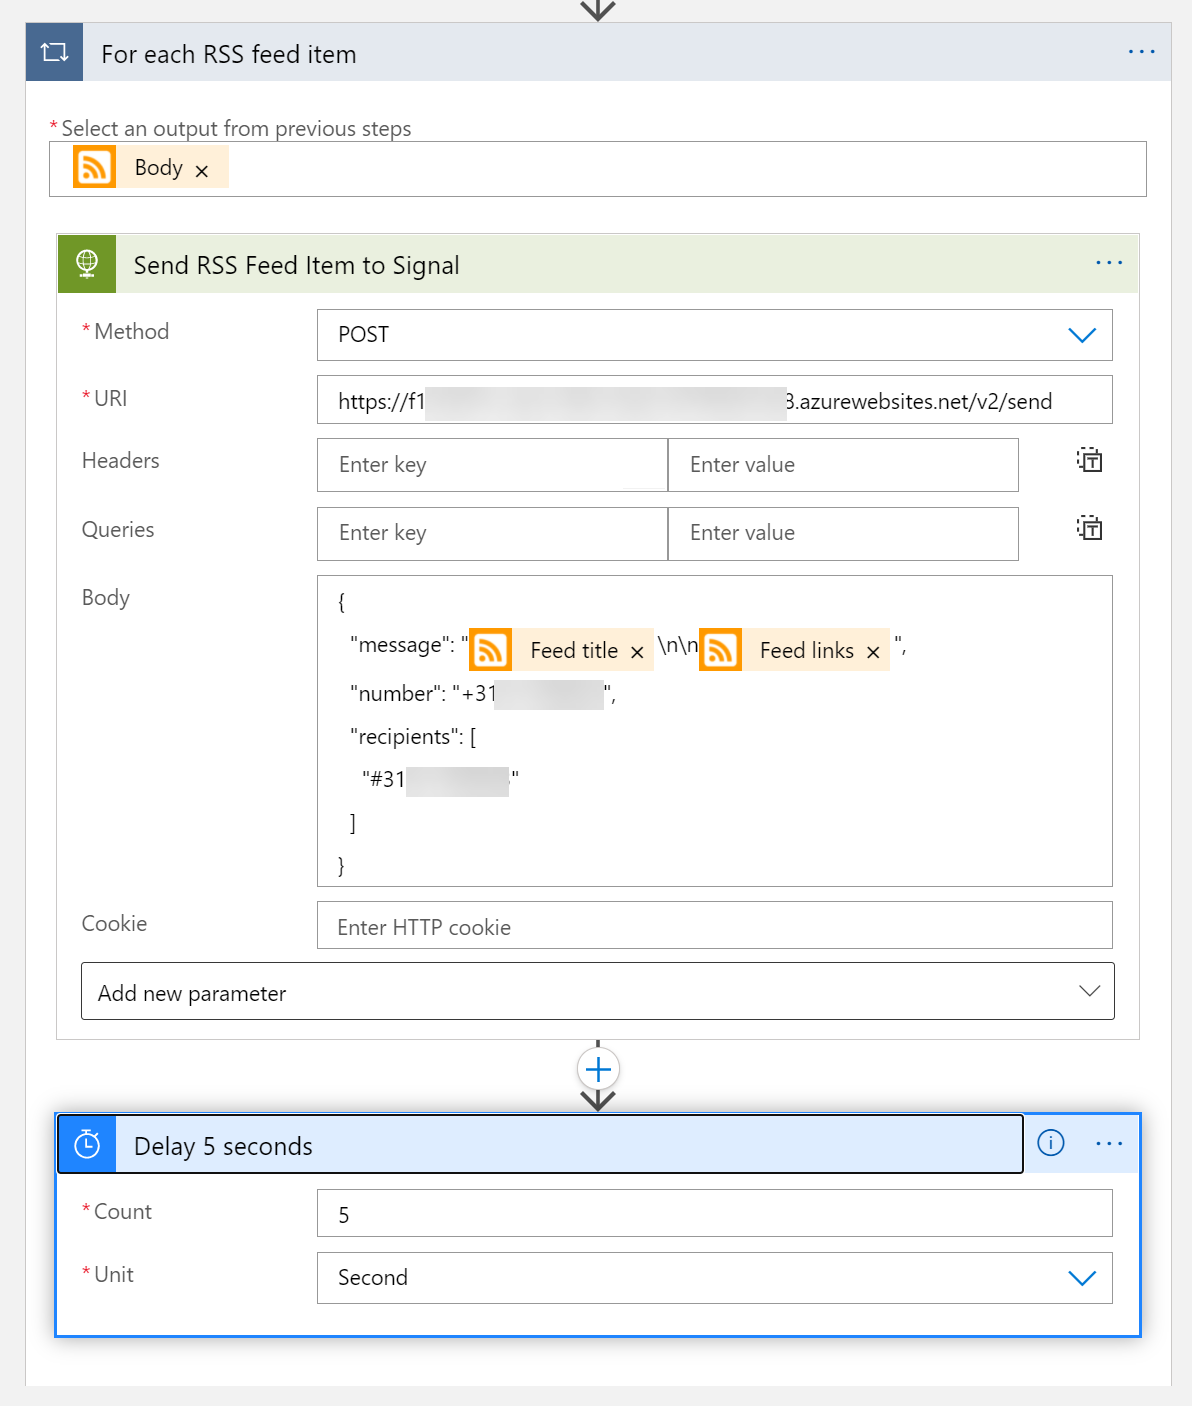
You need to add an extra delay to make sure the Signal-CLI-REST-API does not get too many requests at the same time.
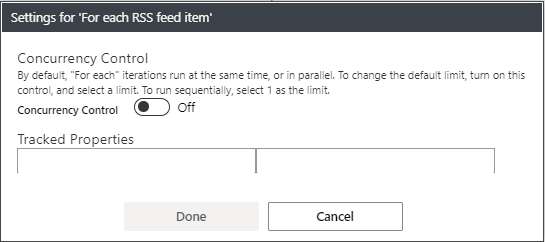
In the for each control setting you also need to set the Concurrency Control to Off. By default, the for each control runs the actions in parallel and that cannot be handled by the Signal-CLI-REST-API running in the Web App.
But we are not completely finished. As a last step we are adding Authentication on the Web App to make sure only authenticated users can call the REST API running in the Web App.
Authentication for the Web App
To enable Authentication on the Web App you need to go to the Authentication setting.
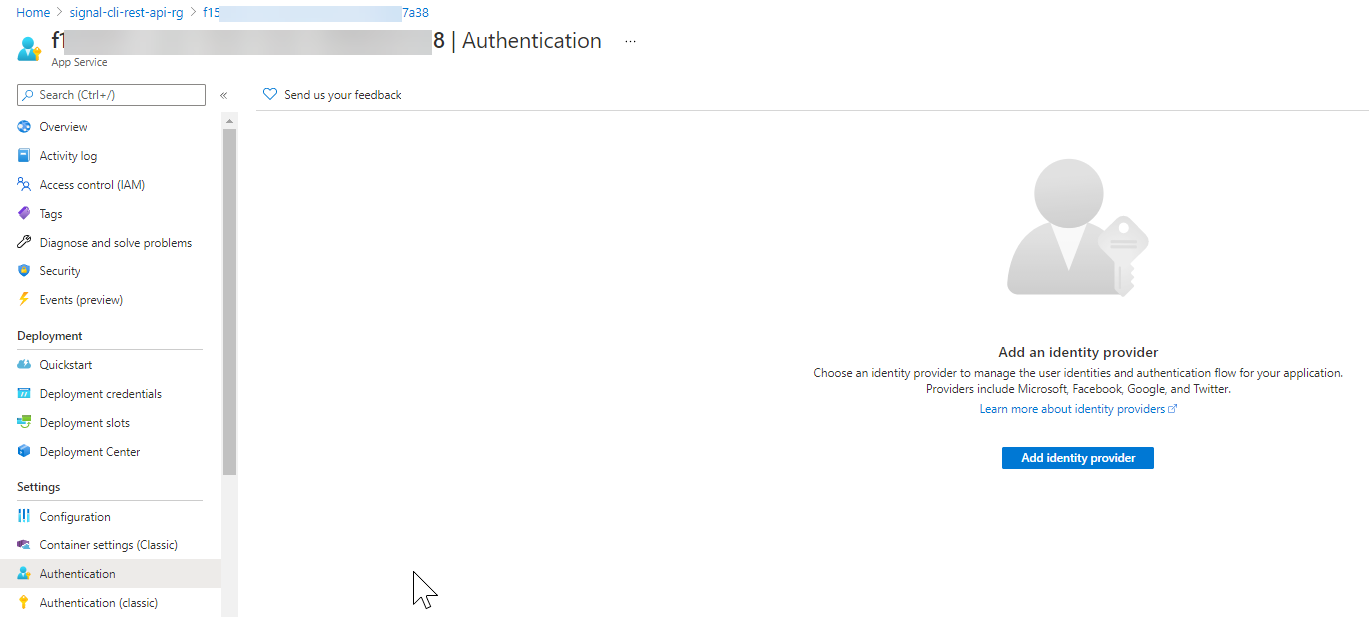
Click on Add Identity provider. Select Microsoft as Identity Provider
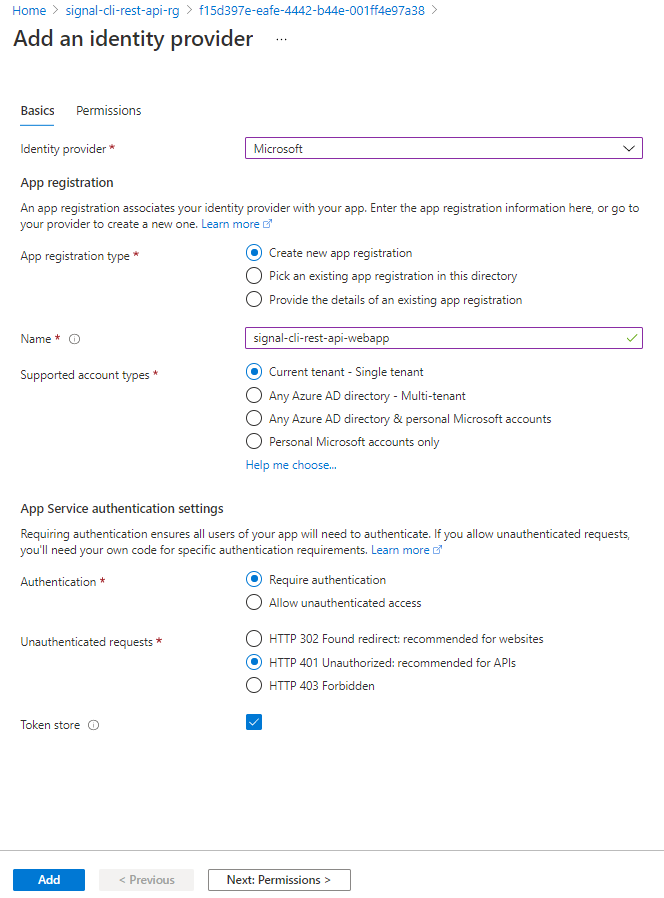
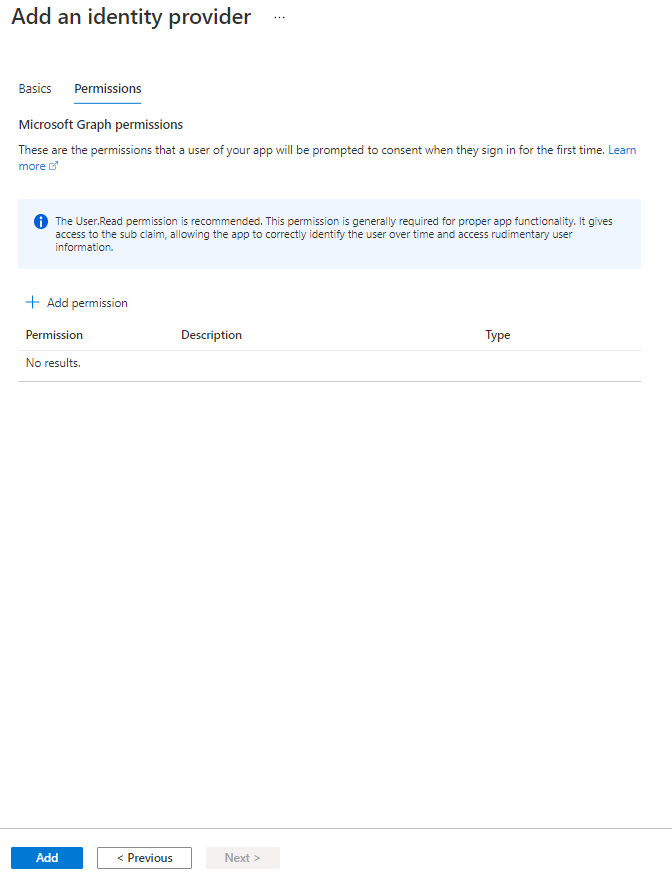
Skip any permissions for now.
Copy AppId/ClientID

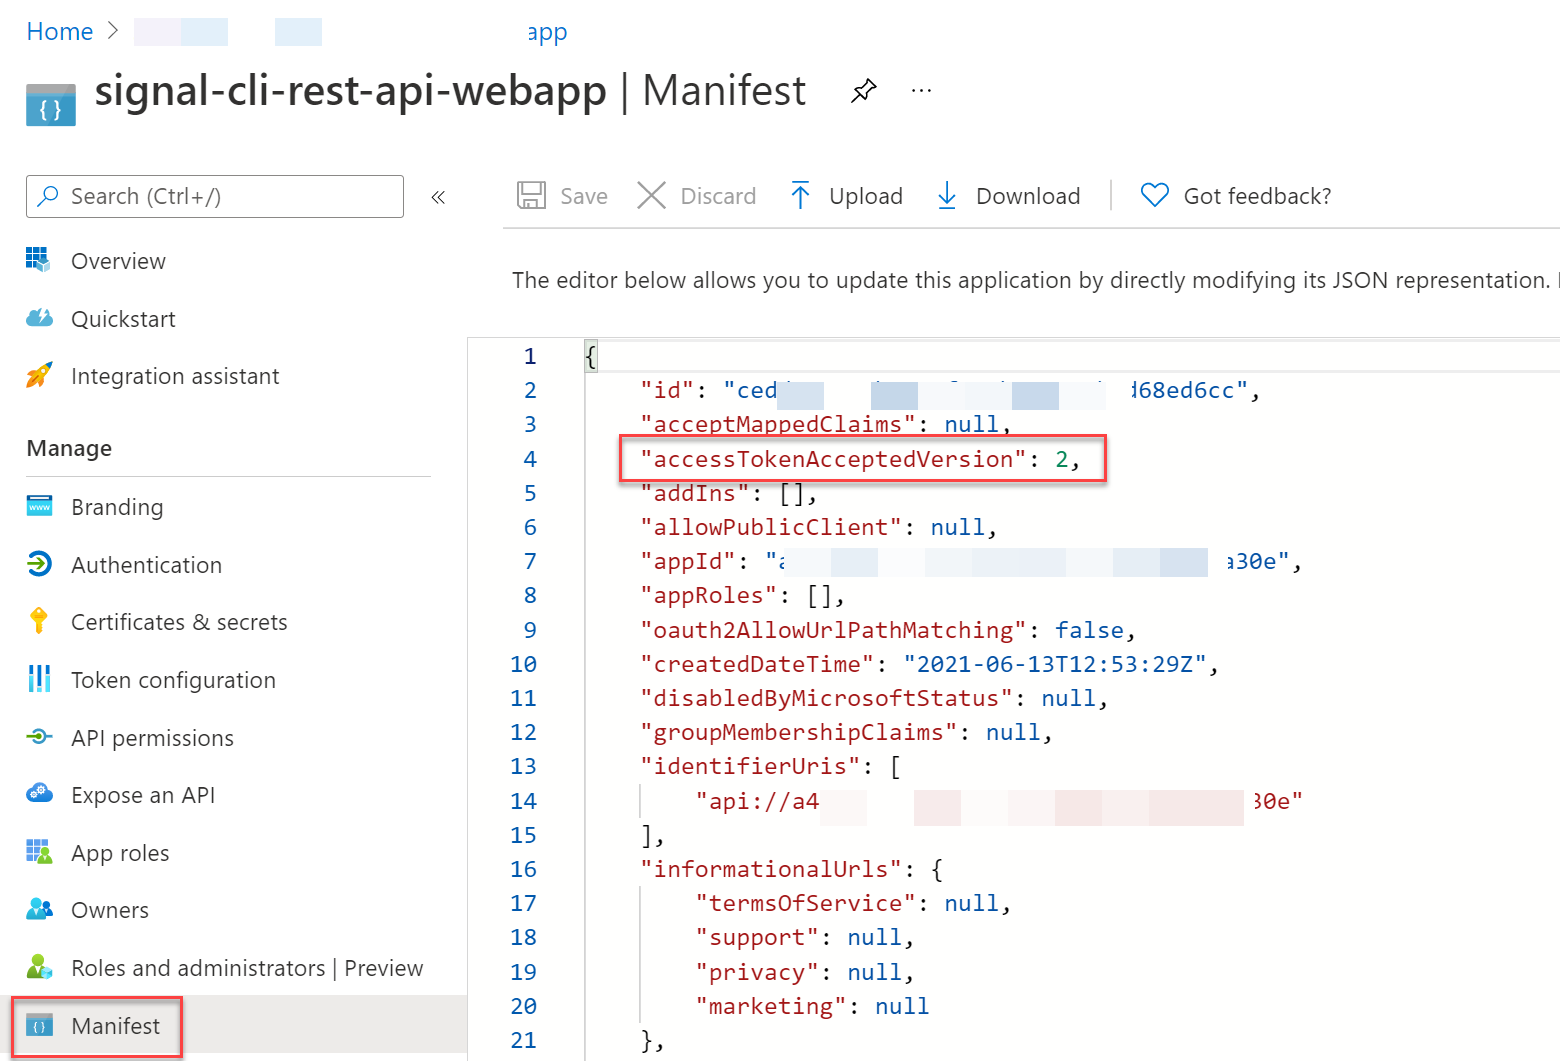
Change the accessTokenAcceptedVersion setting in the App Registration’s manifest file from null to 2. If you don’t do this you might end up with the following error message when calling the REST API:
“IDX10205: Issuer validation failed. Issuer: ‘[PII is hidden]’. Did not match: validationParameters.ValidIssuer: ‘[PII is hidden]’ or validationParameters.ValidIssuers: ‘[PII is hidden]’.””
The final step after enabling the Authentication on the Web App is updating the Logic App Workflow actions to include the authentication.
First turn on the System Assigned identity in the Logic App.

The final steps are updating all HTTP Request actions with the authorization configuration. Select Managed Identity as Authentication type and use the earlier copied AppID (ClientID) as Audience setting.
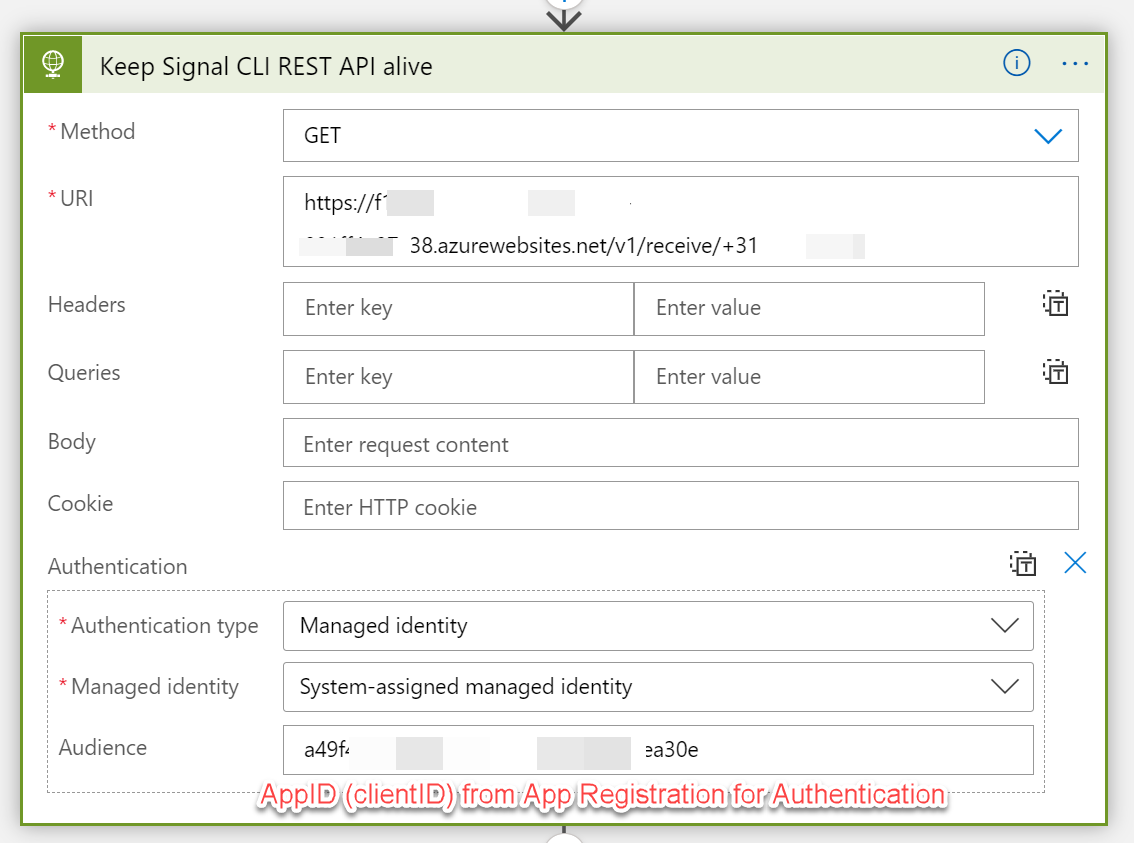
Repeat this for all the HTTP Requests in your Logic App Workflow!
If you want to test the authentication on your Web App using a REST API client like HttpMaster you first need to get an Access Token and use that Access Token as Authentication Bearer Header in the REST API call.
Here is an example:
You need to have a SPN created in your tenant and have the following properties of the SPN:
- ClientID
- ClientSecret
- TenantId
Sample Request
| Get Access Token |
|---|
| HTTPS |
| POST https://login.windows.net/{TenantID}/oauth2/token |
Request Body
Content Type of the request: application/x-www-form-urlencoded
Sample Response
Status code: 200
{ |
You can use this Access Token in the call to the REST API as follows:
| Send Message |
|---|
| HTTPS |
| POST https://[name of web app].azurewebsites.net/v2/send |
Headers
Authorization: bearer eyJ0eXAiOiJKV1QiLCJhbGciOiJSUzI1NiIsImtpZCI6Im5PbzNaRHJPRFhFSzFqS1doWHNsSFJfS1hFZyJ9.eyJhdWQiOiJhNDlmNGM5NC00NzVlLTRmMTgtYTY0My05NzBiOTBiZWEzMGUiLCJpc3MiOiJodHRwczovL2xvZ2luLm1pY3Jvc29mdG9ubGluZS5jb20vNDk2ZjBiMjctNGZhNC00YzNkLThiYmUtMTljNGI2ODc1YzgxL3YyLjAiLCJpYXQiOjMzY4Mjk3NywiZXhwIjoxNjIzNjg2ODc3LCJhaW8iOiJFMlpnWUJCc1hpbXV1YjJncW5yR29qOVRxdVN2QVFBPSIsImF6cCI6IjRlYTJiYmQ5LWJkMTMtNDY1Ni1hYWJhLWViMTU4ZDMzNTgwNyIsImF6cGFjciI6IjEiLCJvaWQiOiJlNzhjMmQ2Yi1iODcwLTQwYmUtOGI0NS03M2EyMTQ1NGFlYjIiLCJyaCI6IjAuQVFzQUp3dHZTYVJQUFV5THZobkV0b2RjZ2RtN29rNFR2VlpHcXJyckZZMHpXQWNMQUFBLiIsInN1YiI6ImU3OGMyZDZiLWI4NzAtNDBiZS04YjQ1LTczYTIxNDU0YWViMiIsInRpZCI6IjQ5NmYwYjI3LTRmYTQtlLTE5YzRiNjg3NWM4MSIsInV0aSI6ImRqTVViWHNuQVVlTk53V2xGSGN2QUEiLCJ2ZXIiOiIyLjAifQ.VFaWOUwfHBzdH83KMlSIXWR6P4AZkMBz5Hgtp3MrIaQez_uVgCdGMYBg63kXuvreSABc5-fDvXqGeVdlB6P5RF3eTIDXD-fGn7yfBSRmliqp88zMN4PUpqJpPnmQ0k6fzQwJ-OGz3pwGiLouEtFedLVPgQRBMD6gY1wl3I_LsIsaJcJhdoy-sJt4YdVDBbZ9ubHQ42-g3RMkQxRnZ8dzzVlHt9UWaPdugALxFCGa4_ADBMrq2u4ix0lKVn6JWkSIpEi-xkf7vMLL9P00l0uV6STKP_QEr8tm2aduES6N7MwbmTSFYO6P7xFiig73CPq5pYdVVhIE0lj4lu2M2Z8Vxw |
Request Body
{ |
Content Type of the request: application/json
Sample Response
Status code: 200
{ |
Status code: 400
| User +316xxxxxxxx is not registered. |
Hope you learned something new.